Familiarising yourself with your gear and shooting night skies generally is a really good idea before trying to capture the northern lights. It is going to be incredibly dark, and you may well have to move quickly, so being comfortable with your gear, setting it up and getting used to the controls is really important. You don’t want to be working it all out in the middle of a northern lights display.
GEAR
You will need:
- A full frame DSLR, with manual mode – full frame for better image quality in low light conditions and manual mode for absolute control over your settings. I shoot with a Nikon D750
- Tripod – a sturdy one that doesn’t shake in the wind over a 20 second exposure. I travel with the Manfrotto Befree Aluminium Travel Tripod.
- Wide angle lens – one wide enough to capture enough landscape with the lights overhead. It should also be fast enough to allow more light to hit the sensor. I used a Nikon 24-70 and Nikon 14-24, which both stop down to f/2.8.
- Remote shutter release – I use the Nikon ML-L3 Remote Control.
- Head lamp – extremely helpful for fiddling with camera settings in the pitch black.
- Under gloves – you don’t want to be shooting with bare hands, unless you don’t mind frost bite! Northface Etip Gloves were great to wear underneath my mittens, as I could use the controls on my camera, and even use my phone, whilst still obtaining some protection from the cold.
- Spare camera batteries – cold temperatures have quite an effect on the life of batteries, so make sure you have a least one spare. I put mine in my coat’s inside pocket, to keep it as warm as possible.
METHOD
Clear and dark skies
You need to find the darkest, clearest skies possible, free from light pollution, for the most detail and vivid colours. You can still shoot the lights on cloudy nights, and sometimes that is all mother nature allows you to work with, but clear skies are your best chance of seeing and capturing them.
Aurora activity
There are apps you can download for this, like ‘Aurora’, which will send alerts when the lights are due to show. Aurora activity (the KP Index) ranges from 0-9, with 0 meaning no activity and 9 being the greatest. Ratings of 5 are considered to be a great show, however the lights chasers we went out touring with (Superjeep – who I would thoroughly recommend) explained that sometimes less is more, as you can end up with more defined streaks across the sky with a lower rating.

Focusing
There are various methods for focusing your camera at night. Some photographers choose to do so during the day, using the camera’s autofocus and marking up the spot for later that night. If you know the location you will be shooting in, this might make the most sense. I practised at home using the infinity method and manual focus instead.
Most lenses have the infinity “∞” symbol, which marks the approximate infinity focus point. This is a great place to start when manually focusing your lens, and most lenses only need to be adjusted very slightly from this position to achieve sharp focus. It will be a case of trial and error until you are satisfied that you have clear, sharp focus.


Settings
Always shoot in RAW image format for maximum control later on when post processing your images.
I usually set my aperture to f/2.8, as it is wide enough to allow enough ambient light in to the lens, but not so wide that it becomes hard to focus at night. Shooting with a lens that opens fairly wide like this will allow you to select a lower ISO setting, and will therefore produce an image with less noise.
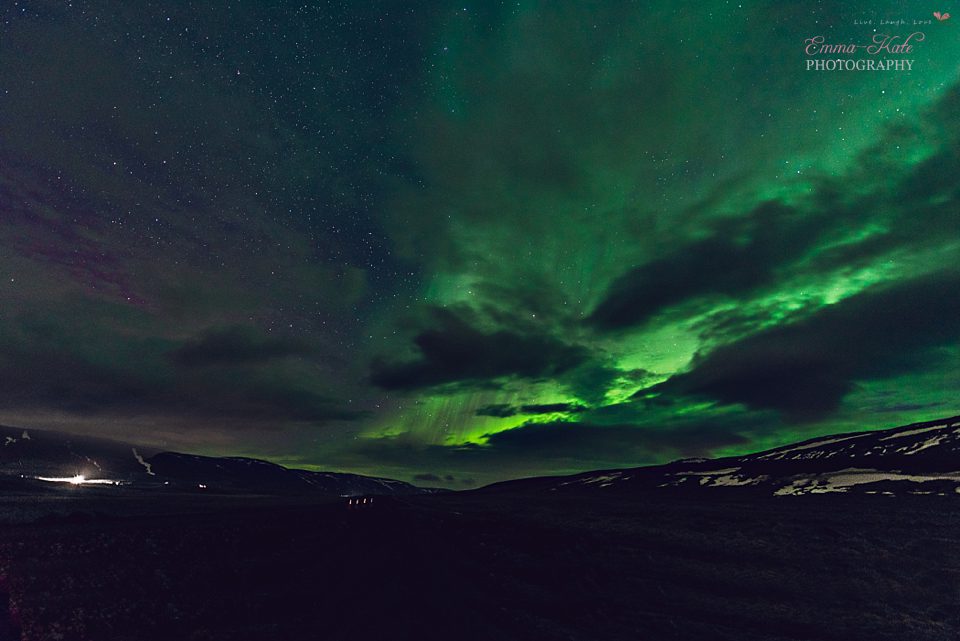
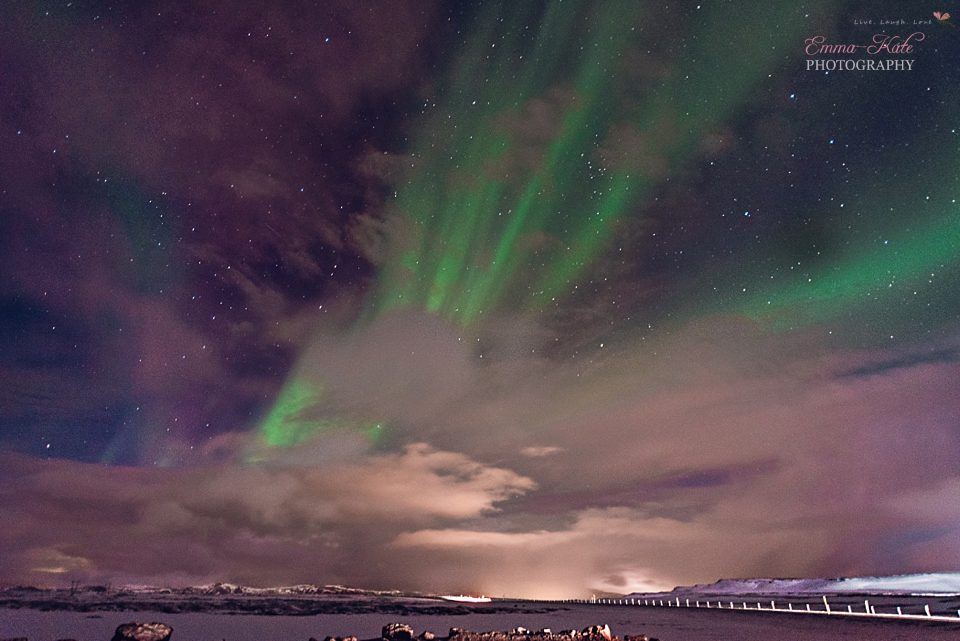
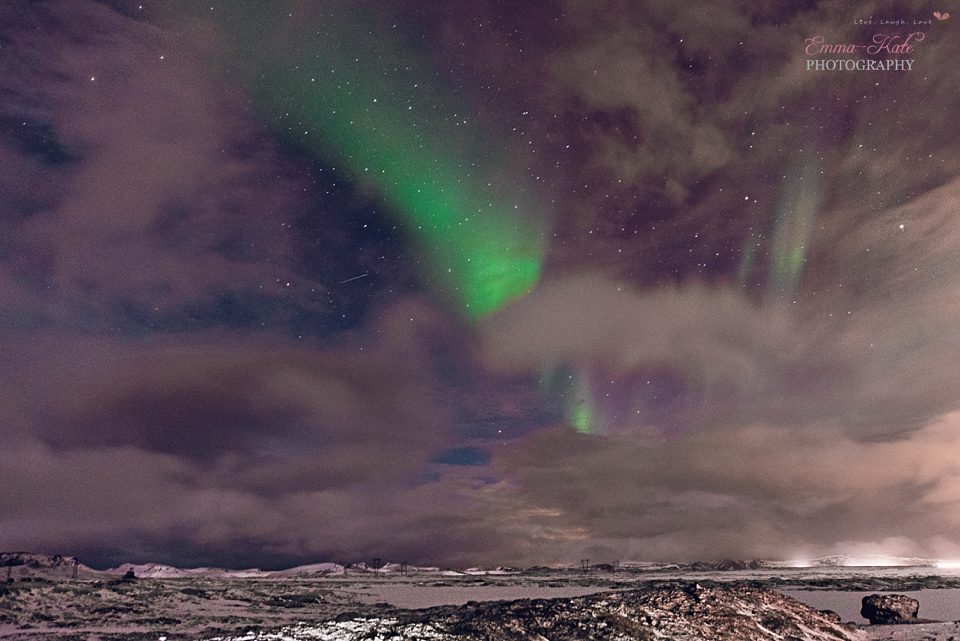
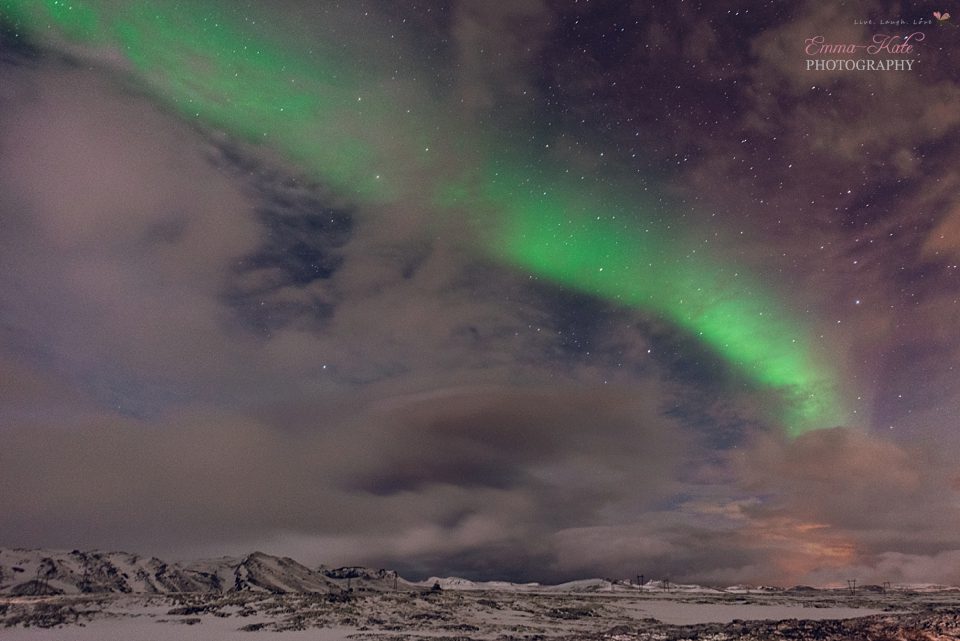
Shutter speed works best between 5-30 seconds, depending on how quickly the aurora is moving. Any longer that 30 seconds, and you will start losing the detail, vivid colour and star trails will start to appear in your images. The images below were shot at 6-15 secs at f/2.8, with ISO ranging between 800 – 3200. I found those to be good starting point settings, and just increased or decreased times/settings according to the conditions I was shooting in.
Your remote control will be very useful in ensuring minimum camera shake, which is very important when shooting long exposures. However, on one occasion the lights completely took us by surprise on the way home from our southern coast tour, and in our hurry to exit the bus before missing them altogether, I forgot to pick up my remote (and also almost tripped over my tripod climbing down the bus steps!). Instead, I used a short timer (just a couple of seconds), to ensure that there was no movement captured from my pressing the shutter button.
Composition
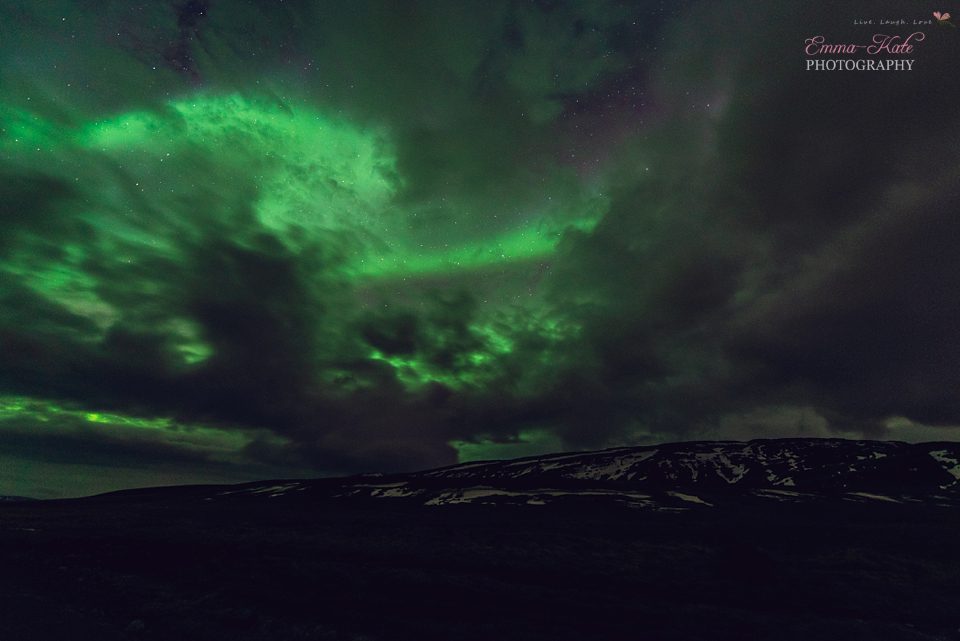
Northern lights imagery is always that much more interesting when there is landscape included in the shot, rather than the camera having been pointed straight up to the sky. This shot below was a ‘test’ shot taken whilst running through the above settings. It is not visually interesting, and not only due to the significant cloud clover blocking the lights.

The northern lights are a natural phenomenon, so include some scenery to give the size of the aurora some perspective.